
Create a Watercolor Design in Photoshop
/Follow along with this free Photoshop tutorial to create a watercolor design perfect for a holiday card—or whatever else you come up with!

Start by creating a new document (File>New) measuring 5x5” @ 300 ppi, with a white background.
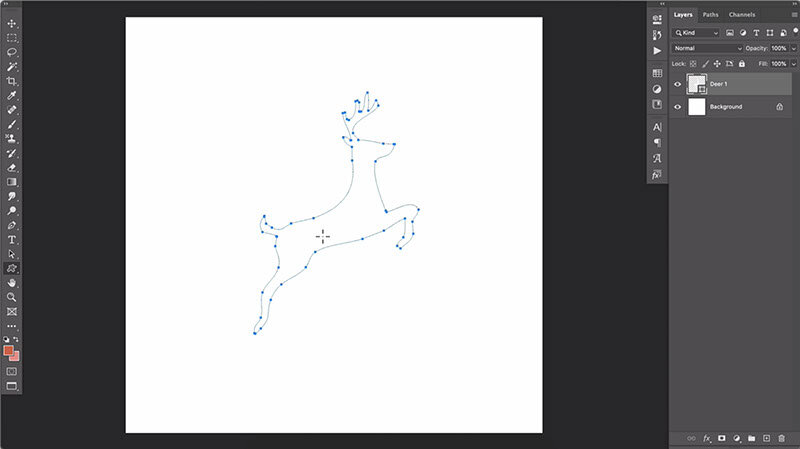
Using the Custom Shape tool, select the desired shape, in this case, a deer. In the Control panel, set the Fill to white and the Stroke to none. Then draw out the shape on the canvas. Depending on your preferences, you may or may not need to hold Shift while dragging to constrain proportions.
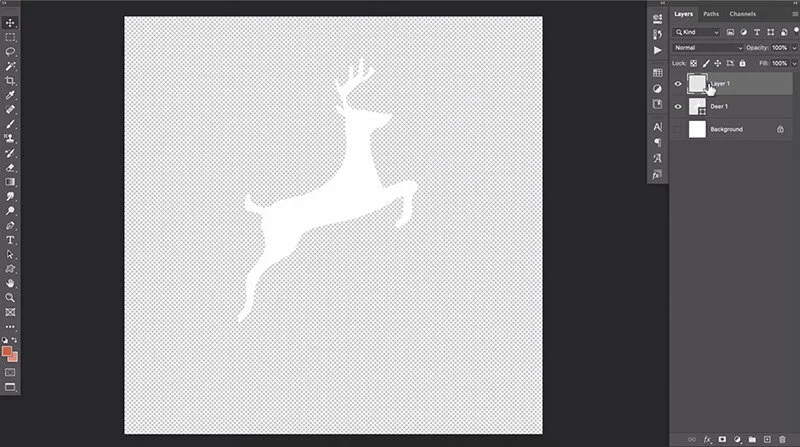
To better see the deer, temporarily hide the Background layer by clicking to remove the eyeball icon to the left of the Background thumbnail. (To open the Layers panel, choose Window>Layers.) Next, add a new, blank layer by clicking the Create a New Layer button at the bottom of the Layers panel. If desired, double-click the words Layer 1 to rename the layer to Paint, then press Enter. We’re almost ready to paint!

Select the Brush tool by pressing B on your keyboard. Click the brush tip preview thumbnail in the Control panel to open your Brush panel. In the top right of the panel, click the cog wheel to open the panel settings. Creative Cloud subscribers can download Kyle Webster’s brush packs for free by selecting Import Brushes. If you need help with this step, this video will walk you through the process of downloading and installing brushes.
Select your desired brush by double clicking it within the Brush panel. In this example, I used the brush called, Big Rough Wash Small Grain from Kyle Watercolor collection.

Next we’ll edit the default brush settings to introduce some color variation to each brush stroke. From the Control panel, click the icon of the folder with the brush on it (next to the brush tip preview) to open the Brush Settings panel. Click to enable Color Dynamics and drag the Hue Jitter slider to 10% (or whatever setting you prefer). This tells Photoshop to vary the chosen hue by a total of 10% (5% in each direction) of the color wheel. When happy with your chosen settings, close the panel and get ready to paint!

Paint the canvas as desired, being sure to cover all of the deer. Next, we’ll create a clipping group so that all this lovely paint we’ve laid down will only appear within the deer shape. To do this, hold down the Alt or Option key and hover your cursor in the space between the paint layer and the deer shape layer. You’ll know you’re in the right spot when your cursor turns into the arrow and square shown in the image above. Then, while continuing to hold down Alt/Option, click with your mouse and the paint layer will magically snap to the deer shape layer, appearing only where the two overlap.

Now that the paint layer is clipped to the deer shape, we can turn the visibility of the Background layer back on by clicking the eyeball icon. Next, we’ll add some alcohol splatter by returning to the Brush panel and selecting another of Kyle’s watercolor brushes, this time called Alcohol. It’s already preset to paint with white, so just click around on top of the deer to overlay some white splotches.
Next we’ll add some additional paint spatter. Because we want the spatter to appear outside the confines of the deer shape, we’ll create a new layer specifically for the spatter paint. Then, select one of Kyle’s Spatter brushes, choose a color, and paint around the deer to add the desired spatter texture.

Now comes the super fun part: GLITTER! This part is optional (obviously). The glitter styles and brushes are available for free download as part of my Creative Toolkit—so go grab it if you want to do this part!
Create another new blank layer, then (assuming you installed the glitter kit), open the Styles panel and click to apply the desired effect. (The style will be applied to the new layer, but you won’t see anything yet because the new layer is still currently blank.)
Still using Kyle’s Spatter brush, paint additional patter over the deer and marvel and how it appears as golden glitter!
Return to the Brush panel, this time selecting the Glitter Outline-LowRes from the Glitter brush folder (included with my free Creative Toolkit).
Paint a glitter nose on the reindeer, along with any additional features. In this example, I also loosely painted the antlers as well as the hooves.

To add the final finishing touches, I used the Type tool to add the message, “O’er the fields we go,” in a loose, handwriting typeface. Finally, to give the finished piece the look and feel of true watercolor paper, I copied and pasted one of the files included in the Watercolor Texture Overlay set from Design Cuts, and changed the texture’s layer blend mode to multiply. Et voila! Our reindeer is ready to guide Santa’s sleigh in style!


